top of page
Costume (and Uniform) Inventory Resources
for Theatre Costumes, Props-Sets, Wigs, Equipment, Uniforms, Patterns and more
Call 855-468-8247 (USA/Canada)

Tutorial - Quick Check-in for Costumes
There are 3 ways to check-in a costume that has been rented or checked out.
1) Place your cursor in the "Check-in Date" field for the item your are checking in and ...
a. Double-click the mouse which will enter today's date - or -
b. Enter the check-in date by typing it in
c. Select a date off the calendar that shows up to the right of the "Check-in" Date field
2) Click on the "Mark All Costume Pieces Checked In" button.

3) Use the "Quick Check-in" screen to scan the Tag ID and check it in.
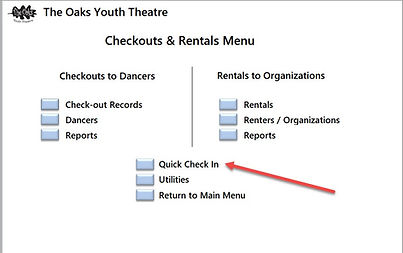
To use the Quick Check-in feature:

From the Rentals Menu - click on Quick Check-in

Select the Costume Check-in (or Props or Wigs)


Place your cursor in the drop-down box at the top. It may say Enter Costume Number or Enter Tag ID. You may scan the Tag ID to check it in or select the Tag ID off the drop-down list.


Once an item has been checked in it will be displayed at the bottom of the screen.
You can return to the Rentals or Check-out screen to see that it has been marked as checked in.


Video of using a barcode scanner to check-in items. Checkout the full Tutorial on Barcode Scanners.

Once an item (costume piece, prop, wig, etc) has been checked in the "Current Location" or status is changed to "Checked In" .
If you want to change the Current Location to "Storage" or any other status (such as Cleaning or Repairs) - you can do that on either the individual costume piece (prop/set, wig) page or from the Rentals/Checkout Screen.
bottom of page