Costume (and Uniform) Inventory Resources
for Theatre Costumes, Props-Sets, Wigs, Equipment, Uniforms, Patterns and more
Call 855-468-8247 (USA/Canada)
Inventory Project Quick Start
Thank you for your interest in the Theatre Inventory Database. This page is designed to help you get started. More information is available in the User Guide at www.theatreinventory.info and on our Support page (www.costumeinventory.com/support).
1. Instructions for Downloading software
2. Installation notes
3. Application Setup
4. Quick tour of software
5. Introduction to Tag ID’s
6. How to apply tags and labels
7. Barcode Scanners
8. Photo tips
9. Help Desk / Support
1. Instructions for Downloading software
The Theatre Inventory Database software is downloaded from the website: www.costumeinventory.com. We do not mail CD’s of the software unless you specifically request it (and pay for shipping).
- Go to www.costumeinventory.com
- Select - Inventory Databases / Download Free Trial
- Enter in your name, email, etc and click the Submit button
- From the next screen - Select the Theatre Inventory Database
The file: Theatre Inventory Database Setup.exe file will download to your “Downloads” folder.
Your browser and Anti-virus software may block this download initially - be sure to look for any questions about Keep/Delete or ‘Run Anyway”. Always ‘Keep’ this file and install it.
2. Installation notes
MS Access:
Before you install the Theatre Inventory Database be sure to have MS Access installed on your computer. The Theatre Inventory Database will work with MS Access 2010, 2013 or 2016 or Office 365. If you don’t own MS Access you can download the free MS Access Runtime 2016 software from microsoft.com.
Install the Theatre Inventory Database:
Click on the Setup file name in your browser or Downloads folder: TheatreInventoryDatabase XX-Setup.exe) or click to “Run” it. Windows will open the software and the setup will begin.
The default folder for the Theatre Inventory Database is:
C:\Costume Inventory Resources\Theatre Inventory Database
All versions of the Theatre Inventory Database will run in MS Access 32 or 64 bit.
** Once the downloads are complete and you can start the program.
PLEASE NOTE: 3 additional files will be installed on your computer at the time of the database installation:
dbPix-30.exe - This is the image processing software that is added on to MS Access to allow you to view and print photos.
JpegRotator.exe - This is a 2nd image processing software that will allow you to Rotate Photos
FRE3OF9.ttf - This is a Barcode Font file to allow you to print the barcode image of the Tag ID
The program will create a shortcut on your desktop with this icon:
The database can be installed on a network. See the Resource Guides for more info.


3. Application Setup
A. Software Registration Key: When the database opens you will see a screen that tells you that you have 30 days left on your free trial. If you are testing this software before purchase, just click on OK and the program will open. Each day you use the database the number of days left in the free trial will decrease.
After you purchase the license you will receive software registration key in a email or on your receipt. The Software Registration Key is a 16 digit number. Enter 4 digits per box.
B. Application Setup: The Installation Checklist screen opens next. Please review the items on the list. On the Company Setup screen you can enter your Company or School name, address, phone etc. If you intend to rent costumes or props the company name, address etc will appear at the top of the receipt.
Options: User Security: You have the option to select to turn on User Security to limit the actions of certain users. See the User Guide for more information.
Application Title: You may choose your application title from a list of options or you can create a new title (see the Utilities menu).
Productions, Checkout/Rental and Individuals - titles. These titles can be changed as well.
Photo Folders: The installation program will create folders for the photos on the computer. The program will list those folders for each module so the database will be able to find your photos quickly.
The default folders are:
C:\Costume Inventory Resources\Photos\Costume Photos
C:\Costume Inventory Resources\Photos\Props Photos
C:\Costume Inventory Resources\Photos\People Photos (for Performer photos in Performance Mgmt)
C:\Costume Inventory Resources\Photos\Pattern Photos
etc.
If you wish to store your photos in another folder - that is fine. Just update the folder address in the
Utilities / Set up folders for Photos - these are the forms on the Utility forms.


4. Quick Tour of Software
The Theatre Inventory Database is made up of Modules and Features:
Modules - These hold records for each type properties you have - Costumes, Props/Sets, Patterns, etc.
Costume Pieces - The collection of costume pieces - shirts, pants, vests, etc. Each individual piece is identified with a unique Tag ID.
Props/Sets - the collection of Props / Set pieces. Most individual items are identified with a unique Tag ID. The exception to this is a collection of small items like a set of silverware.
Performance Management - in the Elite version of the software - This module includes the Ensembles records. An Ensemble record is a collection of Costume Pieces. For example: if a character would be wearing a shirt, pair of pants, vest and coat for a role in a production - the costume pieces can be linked together in an “Ensemble” record.
Scripts - (Add-on) The Scripts module to help you check out Scripts to students
Patterns - (Add-on) The Patterns module lets you create a catalog of your pattern. It is optional and can be added any time.
Jewelry - (Add-on) The Jewelry module lets you create a catalog of your jewelry, medals, watches, etc. It is optional and can be added any time.
Wigs - (Add-on) The Wigs module lets you create a catalog of your wigs, hair pieces, and hair extensions. It is optional and can be added any time.
Shop Tools - (Add-on) The Shop Tools module lets you create a catalog of your tools and equipment. It is optional and can be added any time.
Within each module you can:
Add/Copy records
Link 1 or more photos to record
Search records
Print reports (all reports can be printed to a printer or PDF file)
Assign Costumes / Props etc. to Productions
Checkout / Rent Costumes/Props, etc to individuals or other organziations.
Utilities: There are many Utility functions including the ability to update the lookup tables for the each module. Each lookup table (Colors, Costume type, Storage Location, etc) can be updated to add or edit the choices you see in the Costume/Prop screen.
Features:
Productions - You can assign costume pieces, props/sets, wigs, etc to one or more Productions
Checkout / Check-in - You can checkout / check-in costume pieces, props/sets, etc to performers and other organizations
Performer / Student / Organization records - create a record for each performer in your theatre family or a record for organizations who rent items from you.
Reports - There are a wide variety of reports for each module
Utilities - There are application utilities - like setting up your photo folders, making a backup copy of the database, creating a list of ‘Favorite Tabs’ , and more. Plus there is easy access to the module utilities (updating Costume Type, Color, etc.)
Asset Management Reports - There are Summary and Module Asset Management Reports to list all the items in the inventory, their cost and their replacement costs.

5. Introduction to Tag ID’s
The Costume/Prop/Tag ID is essential to the Theatre Inventory Database. Each Costume Piece/Prop must have a unique ID number. The ID number can contain numbers only or letters and numbers. When you add a new costume piece record you will be asked to assign a new ID or accept the next ID in the sequence. Please note that ID numbers can start with one or more letters - such as ACC-001 or end with one or more letters - such as 1256a - but they cannot start and end with letters.
When a new Costume Piece record is added and the next number in sequence is calculated the program will look only at the numbers within the ID number.
If you are copying a Costume Piece record the program will do it’s best to assign the next number in sequence. If the calculated ID number is not correct - you can always change it by clicking on the “#” button next to the Costume/Prop ID field.
While it is a huge job to put inventory tags in each garment/prop it will save you much time when looking up items or checking items in and out.

6. How to apply tags and labels
Costume Inventory Resources offers many types of tags and labels.
Iron-on tags: The Iron-on tags must be applied with a very hot iron, 350 degrees or hotter. We recommend the Dritz® Petite Press™. It is small and can be used in a costume, has a thermostat and gets very hot. The Petite Press is available in our store. See the Support/Tutorials section of the website for a video.
Sew-in tags: Sew-in tags can be sewn by machine or hand.
Two things to consider when sewing:
1) if you use white thread on a dark fabric the bobbin thread may show on the outside of the garment;
2) if you use black thread you cannot sew too close to the barcode lines as it might confuse the barcode scanner. Leave at least 1/8" space between the thread and barcode. Always test with your scanner before you sew too many on.
Adhesive Labels: Adhesive labels can be applied directly to accessory or prop. The adhesive labels are not waterproof and cannot be submerged in water. They can be wiped off with a damp cloth. If the item you wish to label cannot hold the label (rough wood) or should not have a label as it would be seen from the stage you can apply the tag to a manila or tyvek shipping label and tie the label to the item.
Industrial Labels: The Industrial labels have a very aggressive adhesive - they are Extra STICKY. They work well for shoes and boots and equipment that is handled a lot.
Costume & Theatre Inventory Resources is not responsible for loss of tags or damage caused by applying tags. We provide free samples and encourage customers to test the tags before applying to the collection.


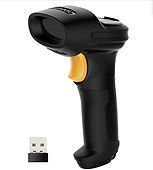
7. Barcode Scanners
If you have inventory tags or labels with barcodes you will need a barcode scanner/reader to read the codes quickly. This is especially useful for checking costumes in and out. We offer them for sale in our store: www.costumeinventorystore.com .
The barcode scanner is just a device to read the barcode and enter the number (Tag ID) at the place where the cursor is resting.
Search: on the Costume/Prop screen you can click on the Search Button. In the Find Costume/Prop by ID field - make sure the cursor is in the drop down box and scan the tag. The barcode reader will type the Tag ID into the box and press ‘Enter’ for you. The screen will display the Costume/Prop record you searched for.
Checkout / Check-in: On the Checkout screen you can select the Costumes or Props to check out by entering the Tag ID in the “Select Tag ID” box - or - use the scanner to type the tag for you. To check items in with the scanner, go to the Quick Check-in screen and scan each item in. You can scan one costume/prop after the other to check them in without using the key board.
Barcode Scanners can be Wired (to a USB port) or Wireless (a small USB connector goes into a USB port). See our website for more info on how to choose the best one for you.
Look at the Support/Tutorials section of the website to see a video of using a Barcode Scanner.
8. Photo Tips
Photo File Sizes: The photos that you upload from your camera to the computer will be very large. While the large photos will work in the database they can slow down the program when you load a screen with many photos or a report. If you view a group of photos in the Photo Gallery or a report with many photos, large photos may not display (they show a checkerboard image). Go to the Support/Help Desk section of the website (www.costumeinventory.com) and look for the Resource Guide “Tips for Saving Photos”. There are instructions on how to reduce the size of your photos.
Setting up a Photo Station: Using a digital camera or phone to take photos of your costumes and props is quite easy but to get professional looking results takes a little work, a little equipment and practice. Setting up a photo station makes your photos look much better.
Photo Station Equipment needed:
• Digital Camera or phone/tablet
• Backdrop to place behind the costume or prop The backdrop will keep the clutter in the background out of the picture. It is good to have 2 backdrops - a light and dark one - for different color garments. (see Resource Guide on creating a photo backdrop)
• Way to hang costumes (IV Pole, suspend a hook or ring from the ceiling)
• Lights - one or two lights will improve your results quite a bit
• If you are using a camera a tripod is recommended. There are tripod accessories to hold phones and tablets as well. (Check Amazon.com)
• Photo editing software - to resize the photos smaller, crop, adjust the brightness, or rotate. Look at FastStoneResizer, Photoshop, etc.

Photo Station Setup

Dress on Backdrop for Photo
9. Help Desk / Support
In the Database: Each of the data entry forms has a quick ‘How to Begin” button with information on how to get started on that screen. It gives you instructions on Adding, Copying records, updating the Utilities, Deleting a record, etc.
On the Website - www.costumeinventory.com/Support On our website we offer many types of help.
Phone - call us at 855-468-8247 (USA /Canada) or 1-530-753-7143 (International)
Email - contact us a info@costumeinventory.com
Remote Login support - we can log into your computer and show you how to do things. Click on the Team Viewer button. We can also schedule Zoom meetings.
User Guides - we have on-line User Guides at www.theatreinventory.info
Resource Guides - we have many short guides to help you with installation, photos, setting up a Costume Inventory Day, and more.
Tutorials - There are tutorials on applying inventory tags, checking out costumes/props, etc.

